In this article, we’ll guide you through the steps to establish a secure site-to-site VPN between your AWS VPC and DigitalOcean VPC using OpenVPN Access Server. This method provides a flexible and cost-effective alternative to AWS’s managed VPN service, allowing greater control over your tunnel configuration.
Unlike our previous article, where we used AWS’s customer gateway and StrongSwan to set up an IPsec-based VPN, this guide focuses on OpenVPN AS to achieve secure communication between the two cloud environments. If you’re looking for an AWS-native site-to-site VPN solution, be sure to check out Site-to-Site VPN between AWS and DigitalOcean Platforms for a StrongSwan-based setup.
By following these steps, you’ll be able to establish a reliable VPN connection between your cloud platforms, enhancing security and connectivity across your infrastructure.
Prerequisites
This guide assumes that you already have OpenVPN Access Server installed and running on an AWS EC2 instance. If you haven’t set it up yet, you can follow the official OpenVPN Access Server installation guide.
Before proceeding, ensure the following:
- Use Ubuntu LTS for installation – OpenVPN Access Server should be installed on an Ubuntu LTS version. For this guide, we are using Ubuntu 24.04 LTS on both:
- The AWS EC2 instance (running OpenVPN Access Server).
- The DigitalOcean Droplet (acting as the OpenVPN client).
- VPC Subnet Information – Take note of your network subnets, as they will be important for routing configurations:
- AWS VPC subnet:
192.168.0.0/16 - DigitalOcean VPC subnet:
10.136.0.0/16
- AWS VPC subnet:
- OpenVPN Access Server is in the correct VPC – The EC2 instance running OpenVPN Access Server should be in the same VPC where you want to establish the site-to-site VPN connection.
- The instance is in a public subnet – It should have a public IP and be in a route that allows internet access so that the DigitalOcean client can connect to it.
- Security Groups & Firewall Rules – Ensure that the necessary ports (typically TCP 943, TCP 443, UDP 1194, and any other required OpenVPN ports) are open for inbound traffic.
Configuring OpenVPN Access Server
Now that OpenVPN Access Server is installed and running, we need to configure it for the site-to-site VPN connection.
Step 1: Log in to the OpenVPN Access Server Admin UI
- Open your web browser and go to the Admin UI
https://your-instance-ip:943/admin2.Log in using the credentials you received during the installation of OpenVPN Access Server.
Once logged into the Admin UI, navigate to the Network Settings section. In the Hostname or IP Address field, add the public IP or hostname of your OpenVPN Access Server.
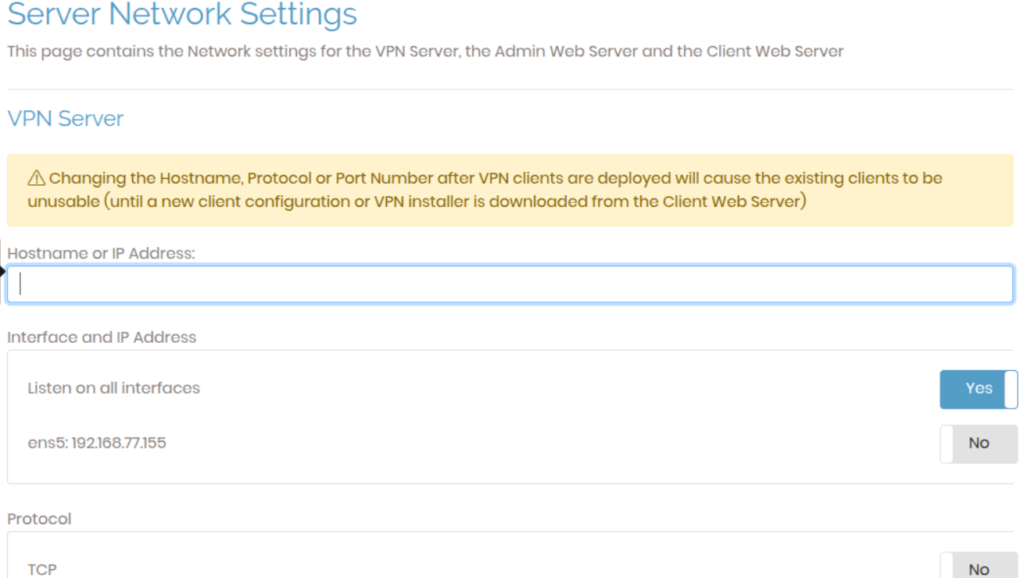
Once done, save the settings to apply the changes.
Next, navigate to the VPN Settings section in the OpenVPN Access Server Admin UI.
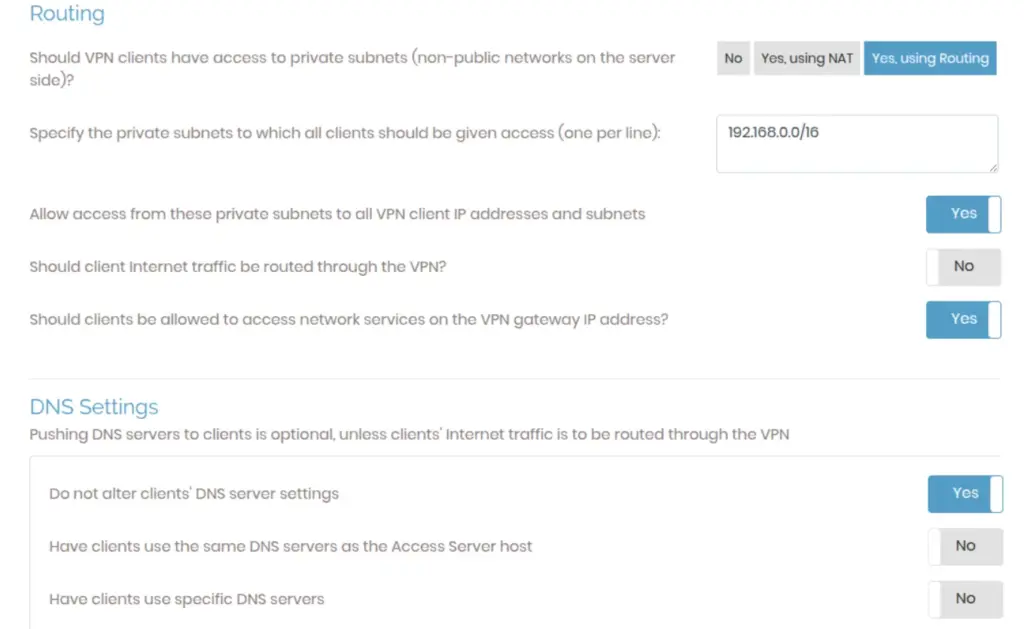
In the Routing section, add the AWS VPC subnet (192.168.0.0/16) to ensure proper routing between AWS and DigitalOcean.
Once done, save the settings, and then click on the “Update Running Server” button to apply the changes.
User Management
In this section, we will configure user permissions and generate the necessary OpenVPN client profile for the DigitalOcean server.
User Permissions
Navigate to the User Management section in the OpenVPN Access Server Admin UI.
Go to the User Permissions tab.
Create a new user that will be used for the DigitalOcean client connection.
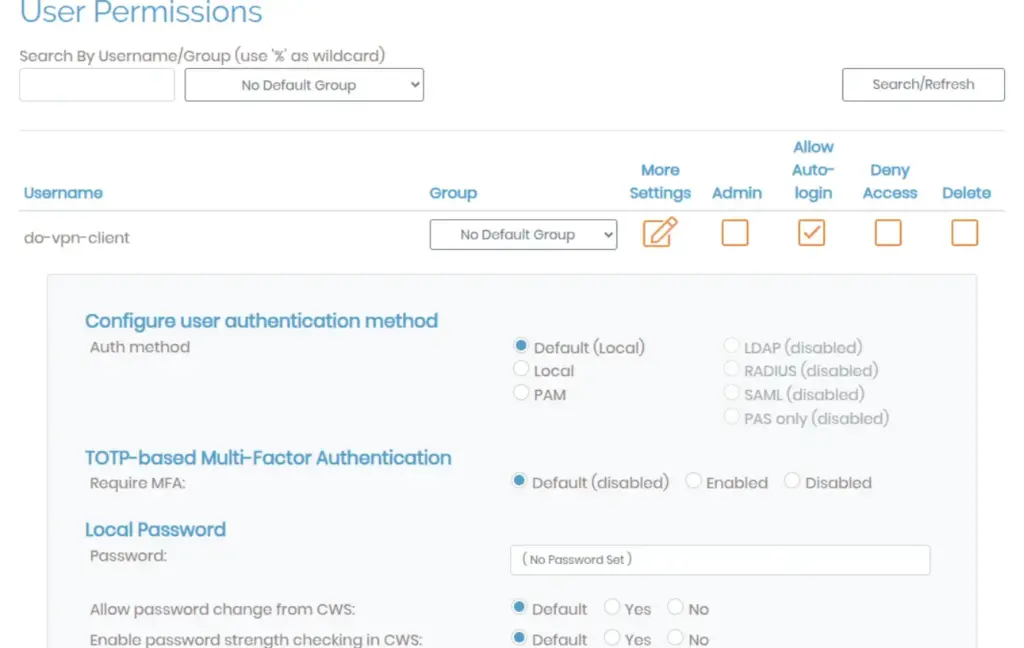
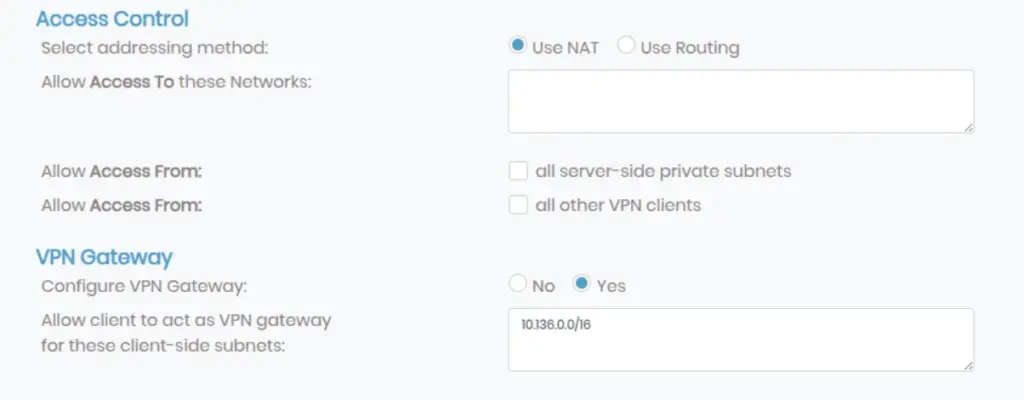
In the VPN Gateway Settings section, add the DigitalOcean VPC subnet (10.136.0.0/16) to allow proper routing between AWS and DigitalOcean.
Once the user is created and permissions are set, save the settings, and then click on “Update Running Server” to apply the changes.
Downloading the OpenVPN Client Profile
Now that we have created a user and configured permissions, the next step is to download the .ovpn client configuration file from the User Profile section. This file will be used on the DigitalOcean server to establish the VPN connection.
Find the user you created in the earlier step for the DigitalOcean client
Click on “New Profile” for this user to generate a new client configuration
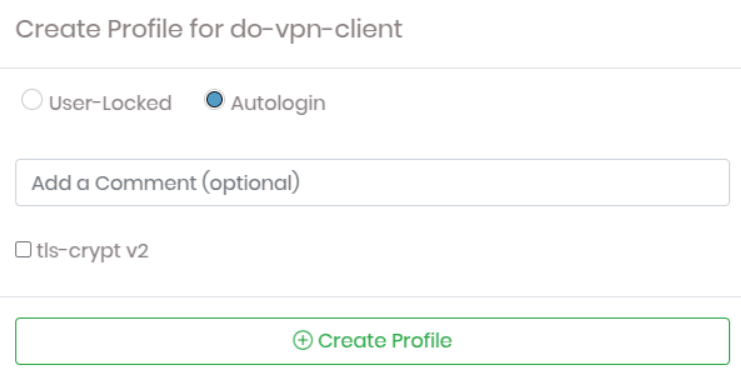
Click on “Create Profile”, which will generate a new .ovpn configuration file
Note: This .ovpn file contains all the necessary configuration details that will be used in the future when setting up the DigitalOcean server as a VPN client.
Launching the DigitalOcean Droplet (Client Server)
Now that we have configured OpenVPN Access Server in AWS and downloaded the client .ovpn file, the next step is to launch a DigitalOcean Droplet, which will act as the VPN client.
In your DigitalOcean account, create a new Droplet using any latest Ubuntu LTS version and place it inside the VPC network 10.136.0.0/16 to ensure proper routing.
Now that our DigitalOcean Droplet is up and running, we need to install OpenVPN 3 on the client machine to establish the VPN connection.
Before proceeding, please install OpenVPN 3 instead of OpenVPN 2, as OpenVPN 2 has some limitations in handling modern VPN configurations and performance optimizations. OpenVPN 3 provides better compatibility and stability for our setup.
Install the OpenVPN repository key used by the OpenVPN 3 Linux packages:
sudo mkdir -p /etc/apt/keyrings && curl -fsSL https://packages.openvpn.net/packages-repo.gpg | sudo tee /etc/apt/keyrings/openvpn.ascRun this command to obtain the Linux distribution-specific information and assign it to the DISTRO variable for use in the next step:
DISTRO=$(lsb_release -c -s)Install the proper repository:
echo "deb [signed-by=/etc/apt/keyrings/openvpn.asc] https://packages.openvpn.net/openvpn3/debian $DISTRO main" | sudo tee /etc/apt/sources.list.d/openvpn-packages.listFetch the latest package information:
sudo apt updateInstall the OpenVPN 3 package:
sudo apt install openvpn3Using .ovpn Profile
Transfer the downloaded .ovpn file to the DigitalOcean client server using SCP, or manually create a .ovpn file using nano and copy the contents from the downloaded file.
Note: Make sure to give the file a meaningful name, like client.ovpn, to avoid confusion.
importing the .ovpn to Configuration Manager:
openvpn3 config-import --config /path/to/client.ovpn --name Do-client --persistentGrant the root user access to the imported Do-client connection profile:
openvpn3 config-acl --show --lock-down true --grant root --config Do-clientStart the VPN session and create the necessary symlinks in system directories to ensure the service starts whenever the system reboots:
sudo systemctl enable --now [email protected]Now start the session vpn session
openvpn3 session-start --config Do-clientThe connection to the OpenVPN Access Server is now successful! To verify that the client is connected, simply run the following command on the DigitalOcean client server:
root@openvpn-access-client:~# openvpn3 sessions-list
-----------------------------------------------------------------------------
        Path: /net/openvpn/v3/sessions/640b93b3se750s42bcsa47bs0f35b1b60bbe
     Created: 2025-02-18 03:49:14                       PID: 919
       Owner: root                                   Device: tun0
 Config name: Do-client
Connected to: tcp:3.136.72.168:443
      Status: Connection, Client connected
-----------------------------------------------------------------------------
Now that the VPN connection is established, verify that both servers can communicate with each other by pinging their private VPC IPs.
At this stage, only the AWS OpenVPN Access Server and the DigitalOcean client server can ping each other. However, other instances within the AWS VPC (192.168.0.0/16) and DigitalOcean VPC (10.136.0.0/16) cannot communicate with each other yet.
To allow full VPC-to-VPC communication, follow these steps:
The first step to enabling communication between all AWS instances and DigitalOcean instances is updating the AWS route table. This will allow other AWS instances within the VPC to route traffic to DigitalOcean via the OpenVPN Access Server instance.
Update the AWS Route Table
go to the Route Tables section in the Virtual Private Cloud (VPC) dashboard. Select the route table that is associated with your VPN server.
in Routes section click on Edit routes and add this routes
10.136.0.0/16 (DigitalOcean VPC)
172.27.224.0/20 (OpenVPN client subnet)
- Click on the Target field for each route.
- A list of target options will appear. Select “Instance” as the target type.
- After selecting “Instance,” another dropdown will appear listing all available instances.
- Select your OpenVPN Access Server instance from the list.
- Save the changes.
Disabling Source/Destination Check on the OpenVPN Access Server
By default, AWS instances drop forwarded traffic unless Source/Destination Check is disabled. Since the OpenVPN Access Server is acting as a gateway, we need to disable this check so it can properly route traffic between AWS and DigitalOcean.
Disable Source/Destination Check:
- Go to the AWS EC2 Dashboard.
- Locate your OpenVPN Access Server instance.
- Click on the instance to open its details.
- Click on the Actions button at the top.
- In the dropdown menu, navigate to:
- Networking → Change Source/Destination Check
- You will see a checkbox labeled “Stop”—select this checkbox.
- Click Save to apply the changes.
Enabling IP Forwarding on the DigitalOcean Client Server
Now, we need to enable IP forwarding on the DigitalOcean client server so that AWS instances can reach all instances available in the DigitalOcean VPC.
Step 1: Enable IP Forwarding
By default, Linux may not allow packet forwarding. To ensure it is enabled, follow these steps:
sudo nano /etc/sysctl.confFind the following line:
#net.ipv4.ip_forward=1
Remove the # to uncomment it, so it looks like this:
net.ipv4.ip_forward=1Save the file and exit
sudo sysctl -pAdd iptables Rules for Forwarding
Now, run the following commands to allow traffic forwarding between AWS and DigitalOcean:
sudo iptables -A FORWARD -i tun0 -o eth1 -j ACCEPT
sudo iptables -A FORWARD -i eth1 -o tun0 -j ACCEPT
sudo iptables -t nat -A POSTROUTING -o eth1 -j MASQUERADE
At this stage, your AWS instances should be able to ping any DigitalOcean instance inside the 10.136.0.0/16 VPC, and vice versa.
In this guide, we successfully established a site-to-site VPN between AWS and DigitalOcean using OpenVPN Access Server. If you’re in need of expert cloud server setup or reliable DevOps services, don’t hesitate to reach out to Server Pundits. Our team is here to help you optimize your infrastructure and ensure smooth, efficient operations. Contact us today to get started!
