Tracking who accesses a system through SSH (Secure Shell) is crucial for security. However, what happens when users delete their command execution history (bash history)? This action erases their trail, making it harder to monitor their activities. Nevertheless, if you are using AWS, there are ways to audit SSH commands even after bash history deletion, ensuring a record of user actions for better security oversight.
Let’s learn more about the method to set up SSH activity logging using AWS Systems Manager.
AWS Native Services we will be using for this setup.
- AWS EC2 instances
- AWS IAM
- AWS KMS
- AWS CloudWatch
- AWS S3
- AWS Systems Manager/SSM
I will be using an Ubuntu 22.04 LTS instance for testing, This instance already has the SSM agent pre-installed,but you are free to use any Linux OS if you prefer.
Before we get started with launching anything, we will need setup a new IAM role which will be assigned to our new test EC2 server. This new role will allow for logs to be sent to and stored in both AWS CloudWatch and S3.
Before creating the IAM role, it’s advisable to set up the bucket name and KMS key as per the policy requirements.
Setting UP KMS
From the AWS Key Management Service console, select customer managed keys.
Select Create Key. I named my Key sessionlogstocloudwatch , but you can call it whatever you want.
The key type needs to be symmetric, key material origin will be KMS or AWS_KMS, key usage will be encrypt and decrypt.
For setting permissions, refer to Set permissions on the KMS key.
Below is a sample policy snippet:
 "Version": "2012-10-17",
    "Id": "key-consolepolicy-3",
    "Statement": [
        {
            "Sid": "Enable IAM User Permissions",
            "Effect": "Allow",
            "Principal": {
                "AWS": "arn:aws:iam::12345678910:root"
            },
            "Action": "kms:*",
            "Resource": "*"
        },
        {
            "Sid": "Allow access for Key Administrators",
            "Effect": "Allow",
            "Principal": {
                "AWS": [

                     "arn:aws:iam::428298842207:user/CMKAdmin"

                ]
            },
            "Action": [
                "kms:Create*",
                "kms:Describe*",
                "kms:Enable*",
                "kms:List*",
                "kms:Put*",
                "kms:Update*",
                "kms:Revoke*",
                "kms:Disable*",
                "kms:Get*",
                "kms:Delete*",
                "kms:TagResource",
                "kms:UntagResource",
                "kms:ScheduleKeyDeletion",
                "kms:CancelKeyDeletion"
            ],
            "Resource": "*"
        },
        {
            "Sid": "Allow access to CloudWatch Log",
            "Effect": "Allow",
            "Principal": {
                "Service": "logs.us-east-1.amazonaws.com"
            },
            "Action": [
                "kms:Encrypt",
                "kms:Decrypt",
                "kms:ReEncrypt*",
                "kms:GenerateDataKey*",
                "kms:DescribeKey"
            ],
            "Resource": "*",
            "Condition": {
                "ArnLike": {
                    "kms:EncryptionContext:aws:logs:arn": "arn:aws:logs:us-east-1:12345678910:*"
                }
            }
        }
    ]
}
Creating a AWS cloud watch Log group:
Create an AWS CloudWatch log group to manage and monitor logs effectively.
1. Navigate to the AWS CloudWatch service console.
2. In the console, locate the “Logs” section and select “Log Group.”
3. Create a new log group. For example, name it “ssm-session-logs.”
4. Set the retention period for this log group to 1 month.
5. Specify the KMS Key ARN. In this case, the ARN could be “arn:aws:kms:us-east-1:12345678910:key/1234abcd”.
Your specific value will differ and can be obtained during the creation of the KMS key earlier.
These steps will help you establish a log group named “ssm-session-logs” with a one-month retention period and the specified KMS Key ARN for encryption.
AWS S3 – Storing SSH Logs in an encrypted S3 bucket:
This step is optional, but in addition to CloudWatch, I also wanted to store logs in S3.
See the IAM Role and Permissions , your S3 bucket name will be different, but basically we need to include this in the policy to allow EC2 to have the proper permissions.
1. Go to the AWS S3 Bucket service console.
2. Create a new S3 bucket.
3. Make sure to name the new S3 bucket as specified in the IAM role policy.
4. Enable default encryption with server-side encryption using an AWS Key Management Service (KMS) key.
Creating a new IAM ROLE:
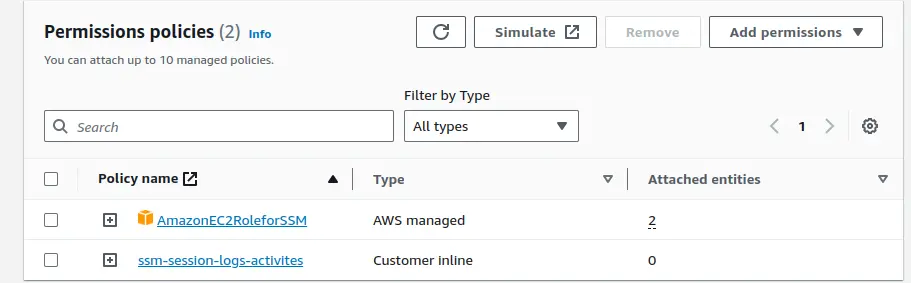
To create and attach a role, start by opening the IAM console, then simply name your role ‘ssm-session-logs-demo’ and proceed to create, attaching two permissions policies. For a detailed guide, refer to Creating an IAM role with permissions for Session Manager and Amazon S3 and CloudWatch Logs .
Below is a sample policy(ssm-session-logs-activities):
{
    "Version": "2012-10-17",
    "Statement": [
        {
            "Effect": "Allow",
            "Action": [
                "ssmmessages:CreateControlChannel",
                "ssmmessages:CreateDataChannel",
                "ssmmessages:OpenControlChannel",
                "ssmmessages:OpenDataChannel",
                "ssm:UpdateInstanceInformation"
            ],
            "Resource": "*"
        },
        {
            "Effect": "Allow",
            "Action": [
                "logs:CreateLogStream",
                "logs:PutLogEvents",
                "logs:DescribeLogGroups",
                "logs:DescribeLogStreams"
            ],
            "Resource": "*"
        },
        {
            "Effect": "Allow",
            "Action": [
                "s3:PutObject"
            ],
            "Resource": "arn:aws:s3:::ssm-session-logs-activites/*"
        },
        {
            "Effect": "Allow",
            "Action": [
                "s3:GetEncryptionConfiguration"
            ],
            "Resource": "*"
        },
        {
            "Effect": "Allow",
            "Action": [
                "kms:Decrypt"
            ],
            "Resource": "arn:aws:kms:ap-south-1:123456789:key/123456abcd"
        },
        {
            "Effect": "Allow",
            "Action": "kms:GenerateDataKey",
            "Resource": "*"
        }
    ]
}
The ‘AmazonEC2RoleforSSM‘ policy is created and managed by AWS itself. You can simply search for ‘AmazonEC2RoleforSSM’ and then add the policy.
Once the role is created, it’s time to attach that role to the EC2 instance.
If you’ve already launched the EC2 instance, modify the IAM role by clicking ‘Action,’ selecting ‘Security,’ choosing ‘Modify IAM role,’ and selecting the IAM role you’ve just created.
AWS Systems Manager Session Manager:
1.Open the AWS Systems Manager console at https://console.aws.amazon.com/systems-manager/.
2.In the navigation pane, choose Session Manager.
3.Choose the Preferences tab, and then choose Edit.
4.Select the check box next to Enable under CloudWatch logging.
5. Select the check box next to Allow only encrypted CloudWatch log groups.
6.Browse log groups: Select a log group that has already been created in your account to store session log data.
7.(Optional) Select the check box next to Enable under S3 logging.
8.select the check box next to Allow only encrypted S3 buckets
9.Enter the name of an Amazon S3 bucket that has already been created in your account to store session log data.
10.Choose Save.
To obtain more details, please refer to streaming session data using Amazon CloudWatch Logs.
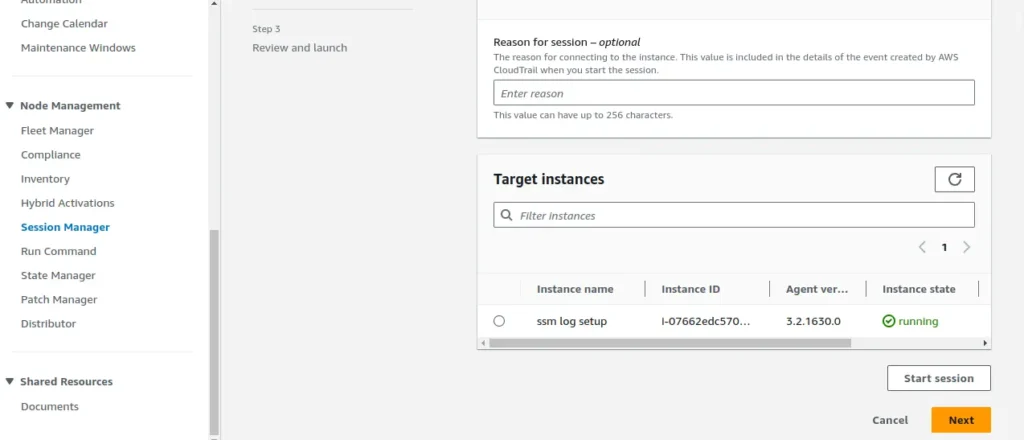
Testing Sessions:
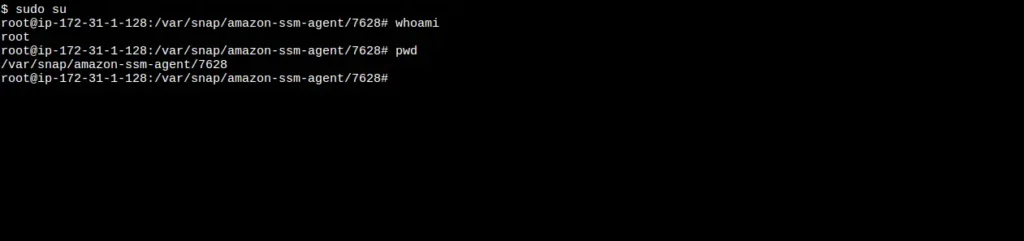
From the AWS Systems Manager, Session Manager section, we will select Start Session. I will select the instance name “ssm logs setup”, your name will be different, remember this was the AWS ubuntu EC2 instance we launched above with the new IAM ROLE and permission policies.
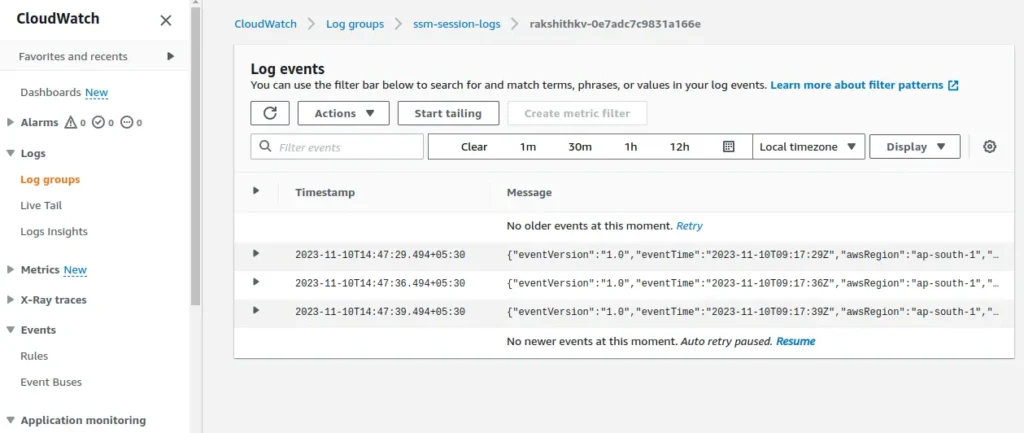
Now if we go back to the AWS CloudWatch Log groups, and open the log group we created, we will see new log events! These contain the commands and other useful info.


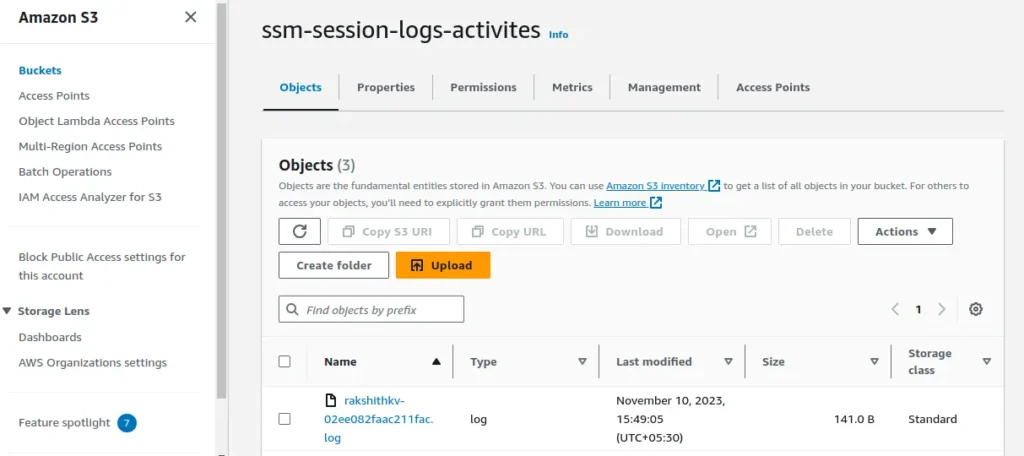
Now if we go back to the S3 bucket we created, and open the newly generated folders and log files, we will see new logs event similar to what we saw in CloudWatch.
I hope this article assisted you in enabling EC2 SSH and session logs using the AWS Systems Manager (SSM) service.
If you require any assistance with managing your servers within the AWS cloud, you can reach out to us. We provide expert Linux server administration services within AWS, DigitalOcean, and Azure clouds.